Bug Invasion
Posted on December 1, 2021 • 9 minutes • 1739 words • GitHub
Table of contents
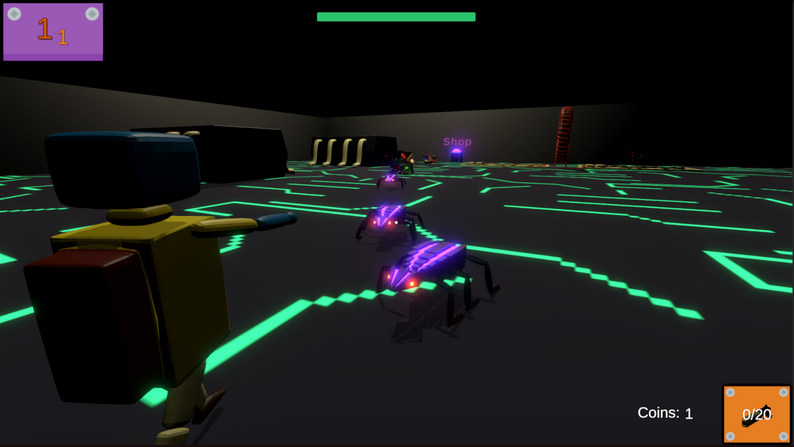
The game is a third person shooter with a pistol to “kill” the bugs and a “fixer” to fix the glitches. I used Trello to mange the project and git as source control with GitHub as host service. The game features procedural animation for the enemies using nav mesh agents and my own attack system, shop with upgrades, wave system, visual effects using shader graph and particle system.
Tools:
- Unity
- C#
- Action events
- Nav mesh
- Shader graph
- Particle system
- git (source control)
- Trello
Procedural animation
After watching Codeers brilliant video, I wanted my bugs to behave the same. To start off I used the inverse kinematics asset called Fast IK by Daniel Erdmann . It is used to determine the motion a bone structure should make to reach a certain position. For example in games where the foot of the character is placed on top of a staircase. In this case the position is determined by a ray shooting down from the foot and colliding with the scene, say the staircase.
In Bug Invasion the bug has 6 legs, 3 on each side. For each leg there is a point transform that is a child of the bug and offset by some value to be close to the leg. Each point has a component with a script that sets the y position to the ground by using a ray and shooting it down from the leg. Each leg has a target transform with a component that stick the foot to the ground until the point reaches a max distance from the foot. The target is the certain position for the IK to solve a motion for. To move the foot from the stuck position to the point, a Vector3 lerp is used to smoothly move the leg over time. To move the foot up a bit the mathf function pingpong is used to move the target up and then down to the point. Without this the foot would move to the point gliding on the ground.
In the video above you can see the bug animated with a slower step time than in the finished game to show the different stages between not stuck and stuck. The target is represented as a green or red sphere wireframe. When it is red it means it is stuck and green when not stuck. The blue one is the point.Enemy AI using Unity NavMesh Agent
The game world is placed inside a computer which has typical circuit board parts. To make the bugs avoid these parts and walk toward the player a Navigation mesh is used, also known as NavMesh. To create a NavMesh inside Unity I mark the parts and the ground as Navigation Static and then adjust the agent size and radius and also max slope and step height. There is only one size and radius when baking but I don’t have to worry about that because I only have one type of enemy. To make the bug navigate this NavMesh the bug has a component called NavMesh Agent which has the same size and radius as used in the NavMesh. It also has some steering parameters that controls the speed, acceleration and rotation speed. I defined a bug and human agent size asset to make the bugs avoid colliding with each other and the player. (When developing, the bugs walked and rotated toward the player with my own implementation using Coroutine and rigidbody velocity being set to a speed multiplied by the normalized vector from the enemy to the player. This was changed to NavMesh beacuse it was more natural looking and could avoid the parts of the computer.) To make the bug move toward the player a script is used to set the destination of the NavMesh Agent to the players’ position each fixed update. When the enemy is attacking or dead isStopped is set to true to stop the enemy from moving.
Attacking
When the player is close to the bug, the bug attacks the player and deals damage. This is done in the bugs’ Update function which is called each frame. To know if the bug is in range a distance is calculated with the Vector3 distance function with the player and bug position. Then the DamageRange and the distance is compared and if the distance is smaller and the bug attack is not on cooldown it deals the damage. It also sets the attack on cooldown which is a Coroutine that adds the Deltatime to the attackTime and stops adding when the attackTime is higher than the attackRate. The attackRate is when the bug attacks so if the attackRate is 2, the bug will attack each 2 seconds. (A better name would be attack interval) An animation is also played that moves the bug toward the player using LeanTween and a bite particle is Instantiated.
ITarget
To make the enemy or player take damage I created an interface called ITarget. It has only one function called Damage which the bug or the player defines. The definitions take the health of the target and subtracts it with the damage parameter. It then does whatever should happen when that target takes damage. When the bug takes damage it invokes a OnHit event and instantiate a hit particle which is destroyed after 2 seconds. I use this interface to see if the gun hits something that can take damage. The gun shoots a ray and if the hit has a ITarget component, the damage function is called with the gun damage number.
interface ITarget
{
    void Damage(int damage);
}
private void DamageTarget(RaycastHit hit)
{
    GameObject ps = Instantiate(HitEffect, hit.point, Quaternion.LookRotation(hit.normal));
    Destroy(ps, 2f);
    ITarget target = hit.collider.GetComponent<ITarget>();
    if (target != null)
    {
      target.Damage(DamageNumber);
    }
}
Better with Health
The negative with this system is that a definition has to be written with every new ITarget. Subtracting a health number is written with each ITarget which is code duplication that should be avoided. Another solution would be to have a Health component which only deals with health subtraction/addition. The only difference in the gun is to get the Health component instead of the ITarget. To make the bug or player do something when they take damage an event would be invoked which the bug or player subscribes to. Instead of having a damage function in the bug and player class which subtracts a damage number it only has to be defined in the Health component. This could also be done with a different event for dying. This separates the code and keeps the classes with minimal responsibilities. With this solution you can add the Health component to a GameObject and now have a health number that decreases each time you shoot at it without having to code anything and only using the Unity Editor.
//example class
public class Health : MonoBehaviour
{
  private int currentHealth;
  private int maxHealth;
  public void Damage(int damage)
  {
    OnDamage?.Invoke();
    currentHealth -= damage;
    if(currentHealth <= 0)
    {
      OnDeath?.Invoke();
    }
  }
}
UI
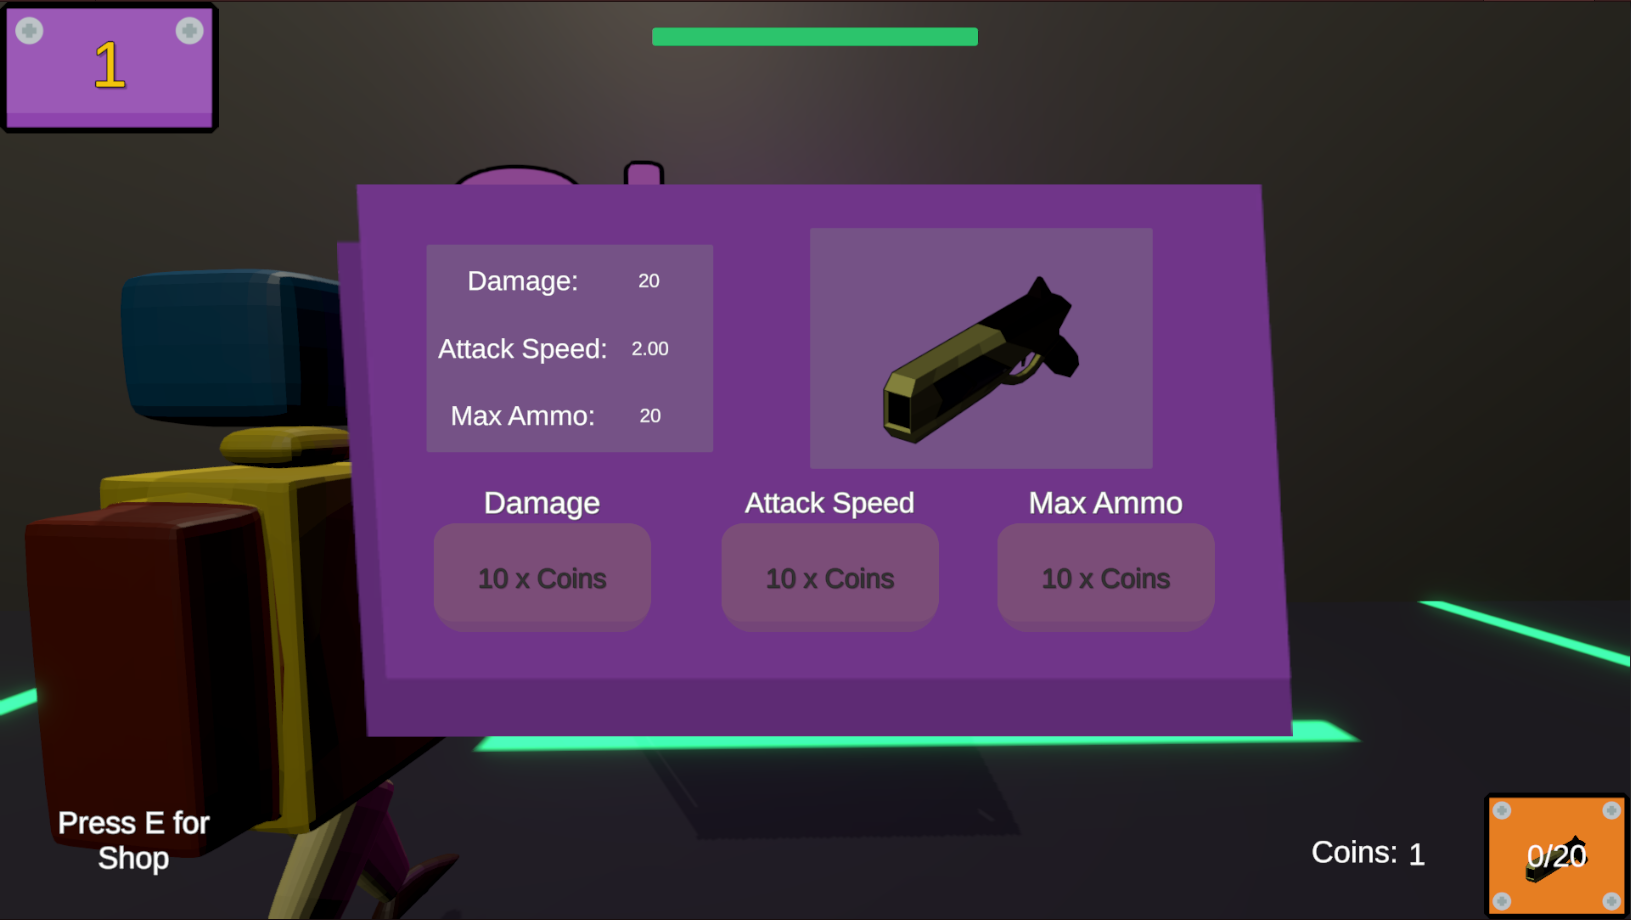
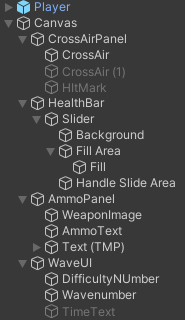 A Canvas is used as the parent to all the UI and the Canvas is a child of the game scene. This will place the UI correctly with different resolutions. Evey UI element is only displaying data and not creating it to seperate it from the logic. The healthbar is created with a Slider. It is updated with a HealthUI component every frame by assigning the slider value to the players’ health. The player reference is set by dragging the player to the inspector in the editor. For the ammo a somewhat different approach was used with events. Two events invoked by switching guns and adding ammo to the current gun. When switching guns, the weapon image is changed to the object that was passed through the event. The current gun in the UI is also changed. Adding ammo to the gun will spawn text in the scene showing “+5”. Updating the ammo text is done through the Update function by using the current gun.
Improvement
Some improvements to the UI need to be done in order to scale it for further development. To easily make changes to the UI and separate it from the game scene a scene is created for it. Modifying the UI can now be done in its own scene and to use it in the game scene we load it in. Another advantage is that we can test the UI without having to start the whole game scene. Another improvement is to use an event to update the healthbar instead of updating it each frame. Each time the player takes damage we invoke an event and the health UI assign its new value. The UI showing the current ammo would also be updated with an event instead of an Update.
Making each type of UI a prefab would also make it more editable without having to change the UI scene although the prefabs could display different when editing them in the prefab mode. To fix this we can set the prefab editing environment to be the UI scene. With the UI being its own scene a different problem arises. Now we cannot drag the player to the healthbar so to solve it a UI controller is used to add the functions of the UI to the different events. The events are static so we can use the class name and the name of the event to add the functions.
What I learned
My goal for this project was to be a part of a game jam and finish in time and to create a procedurally generated animation. I did finish in time but could have polished the project more as mentioned in the improvements in UI and Attacking. The bugs’ procedurally animation is the most interesting part of this project and I believe the animation turned out good. Although one thing that I could have done is to research how bugs walk in real life to get a grasp of what I am trying to create. The player model also lacks some polish and the walk animation also need to be better. Next time I would create the animation in blender instead of using a proceduraly animated one.
I will take the improvements that I mentioned and use more composition when I design my systems in my next project. It was also a fun and good learning experience trying to create a game in a limited time frame.